|
|
 
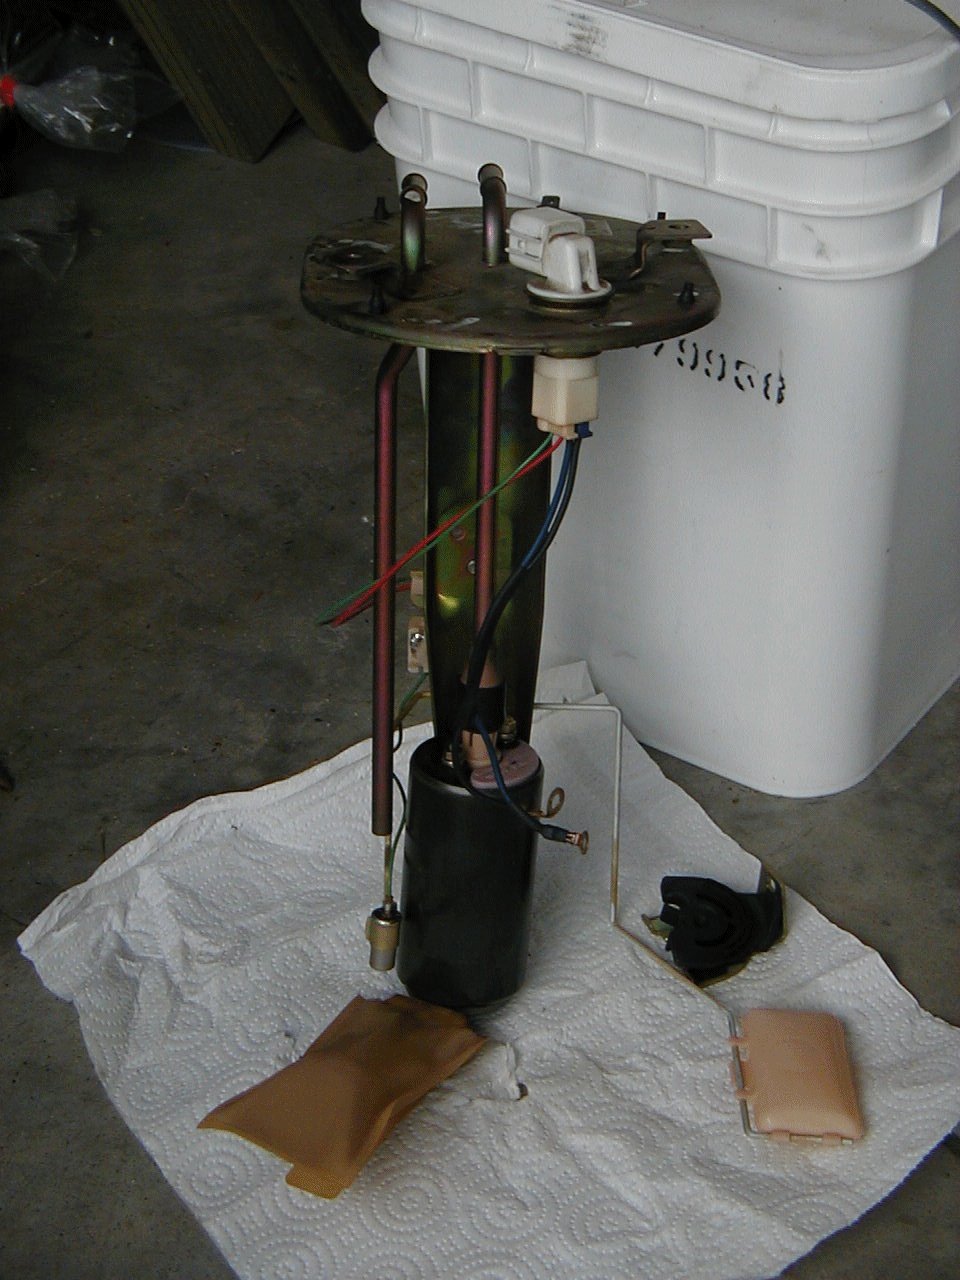
| I recently installed a Bosch fuel pump (10/00) to keep up with the engine's high fuel demands. An aftermarket pump is a good place to start if you ever plan on increasing your fuel delivery over the stock setup. The stock setup is capable of supporting 350 RWHP. This usually involves running 14 psi of boost. After you've reached this point, the fuel pump, fuel rail and injectors are pretty well maxed out. A relatively inexpensive way to increase fuel flow while maintaining your stock injectors involves installing a larger fuel pump and a Rising Rate Fuel Pressure Regulator (RRFPR). The RRFPR increases fuel pressure as boost is increased. The added pressure squirts just enough additional fuel through the injectors to support 15 or 16 psi of boost. A RRFPR can also be used to add extra fuel in the case where a midpipe is used. The only other options are to add injectors, or replace the stock injectors with bigger ones. In each case, a computer needs to be purchased to run the injectors. The Bosch fuel pump I am using is a high performance fuel pump designed for BMW V8 engines. I don't have the specs on it but It flows more fuel than I will ever need. Installation The Bosch fuel pump is a little bigger in actual size than the stock fuel pump. Therefore, modifications needed to be made to the stock fuel pump assemble to accommodate such a beast. First the long metal fuel line that meets up with the stock fuel pump needs to be cut back. I simply ran a rubber fuel line to make the connection from this line to the Bosch fuel pump. The Bosch fuel pump doesn't come with a filtering screen and the stock screen assembly doesn't fit on the larger nipple at the bottom of the fuel pump, so one had to be fabricated. All I did here was cut away the factory screen from the plastic mounting assembly, used to mate it with the stock pump, and wrapped it around the Bosch nipple securing it with a hose clamp. The Bosch pump bolted up to the assembly the same way the factory pump did. The pump assembly was dropped back into the tank and everything worked fine. There are a couple of things to do or look out for when doing the fuel pump installation. 1. Release the pressure in the tank and fuel lines before removing the fuel pump assembly. 2. Make sure the new pump is not sitting against the bottom of the tank, this will prevent fuel from entering the pump. This can be adjusted this by trimming back the nipple. 4. Make sure the fuel pump is not sitting too far off the bottom of the tank. This will create fuel slosh causing the car to hesitate in corners and during hard launches. 5. Make sure the measuring float is installed the same way you took it out. 6. Remember to prime the fuel lines before attempting to start the car.
Note: This is not the M2 Bosch pump. Installation is similar for this pump, but not identical. Details on the M2 Bosch fuel pump can be found on http://www.efini.net/fuel.htm
Fuel Pump Assembly
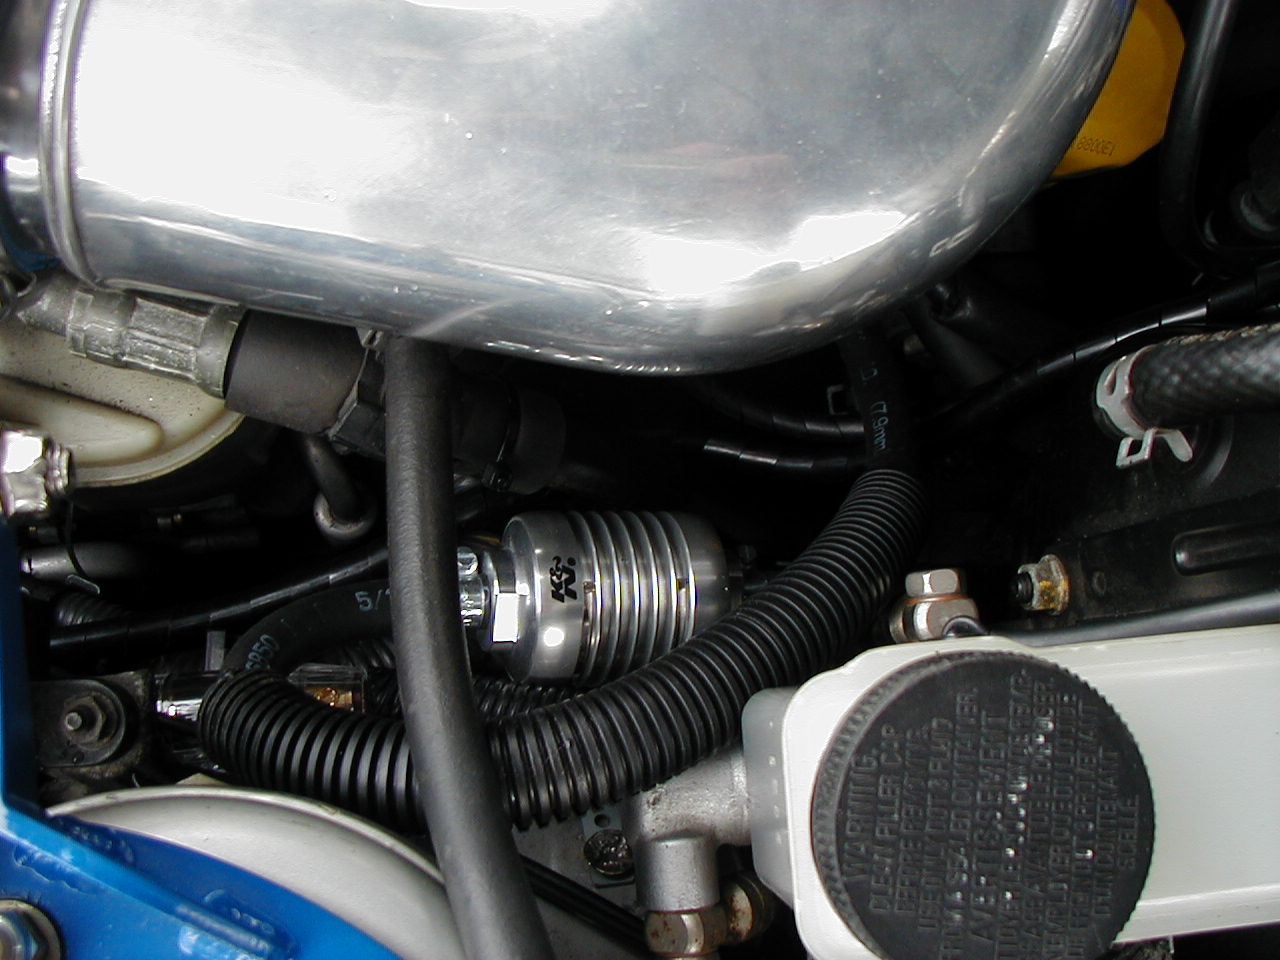
Fuel Filter Replacement Although Mazda recommends replacing the fuel filter every 60K miles, it is a good idea to replace your fuel filter every 20K. The reason being is that one of the major causes of premature engine failure was due to clogged fuel filters. Since these engines are not very tolerant to lean conditions it is a good idea to be on the safe side and just replace your filter every 20K. The only problem with replacing the fuel filter is that it sits up on top of the rear differential housing. Fuel filter replacement is not a difficult task, just time consuming. Mazda fuel filters are not cheap either. They can be purchased for $36 at your local dealer. After replacing my fuel filter the first time I experienced first hand what a pain this task can be. When it came time to replace it the 2nd time, I decided to do the fuel filter relocation mod. This simply involves moving the fuel filter up to the engine compartment where it can be easily accessed so changing it in the future isn't as much of a chore. I chose the K&N fuel filter as the replacement for the stock filter. This filter is specifically designed for fuel injected engines (very important), filters particles up to 10 microns, outflows the stock filter and is washable/reusable. I ordered mine from Jegs and received it in 2 days.
Installing the K&N fuel filter was extremely easy. You simply tap into the rubber hose under the intake elbow going to the engine which is closest to the dipstick. You will need approximately 1 foot of 5/16 inch fuel line. The most difficult part of this mod is taking out the OEM filter and bypass it with about 8 inches of 5/16 inch of fuel line. This will take some time and patience. The hardest part is getting pliers up behind the rear differential housing and squeezing the factory hose clamps together, sliding the clamps back, so the fuel line line can be twisted off. My fuel lines were stuck on pretty good so I cut them off with a razor blade. Inserting the new fuel line was a piece of cake. It would be very handy here to buy a pair of needle nose vice grips for putting on and taking off the hose clamps.
Notes: Before beginning this procedure, make sure all fuel pressure is out of the line. To do this first open the gas cap, then start the car. While the car is running pull the green relay in the fuse box next to the battery. When the car stalls, most of the fuel pressure has been released. Be careful when pulling off the lines. The small amount of fuel pressure left in the fuel system may cause gas to spray. After the installation of the new fuel filter is complete, the fuel lines need to be primed before attempting to start the vehicle. This is done by shorting out these two terminals (shown below) in the diagnostic box next to the battery while the ignition is in the "on" position. You will hear the fuel running through the lines when the terminals are shorted. It only takes a few seconds to fully prime the system.
K&N Fuel Filter Installation
|